Administration overview
Who can do this: organization administrators. Operators and viewers cannot open the Administration area.
The Administration area is where you set up everything Pulse monitors for your organization: the rooms and equipment, the sensors attached to them, the services that turn sensor channels into dashboard cards, the alarm limits, and the people who are told when something goes wrong.
Open the Administration area
- Sign in to Pulse.
- Click Admin in the page header. The link is shown only to organization administrators.
The hub page is titled Pulse Admin. If an operator or viewer opens the same address they see an Access denied page.
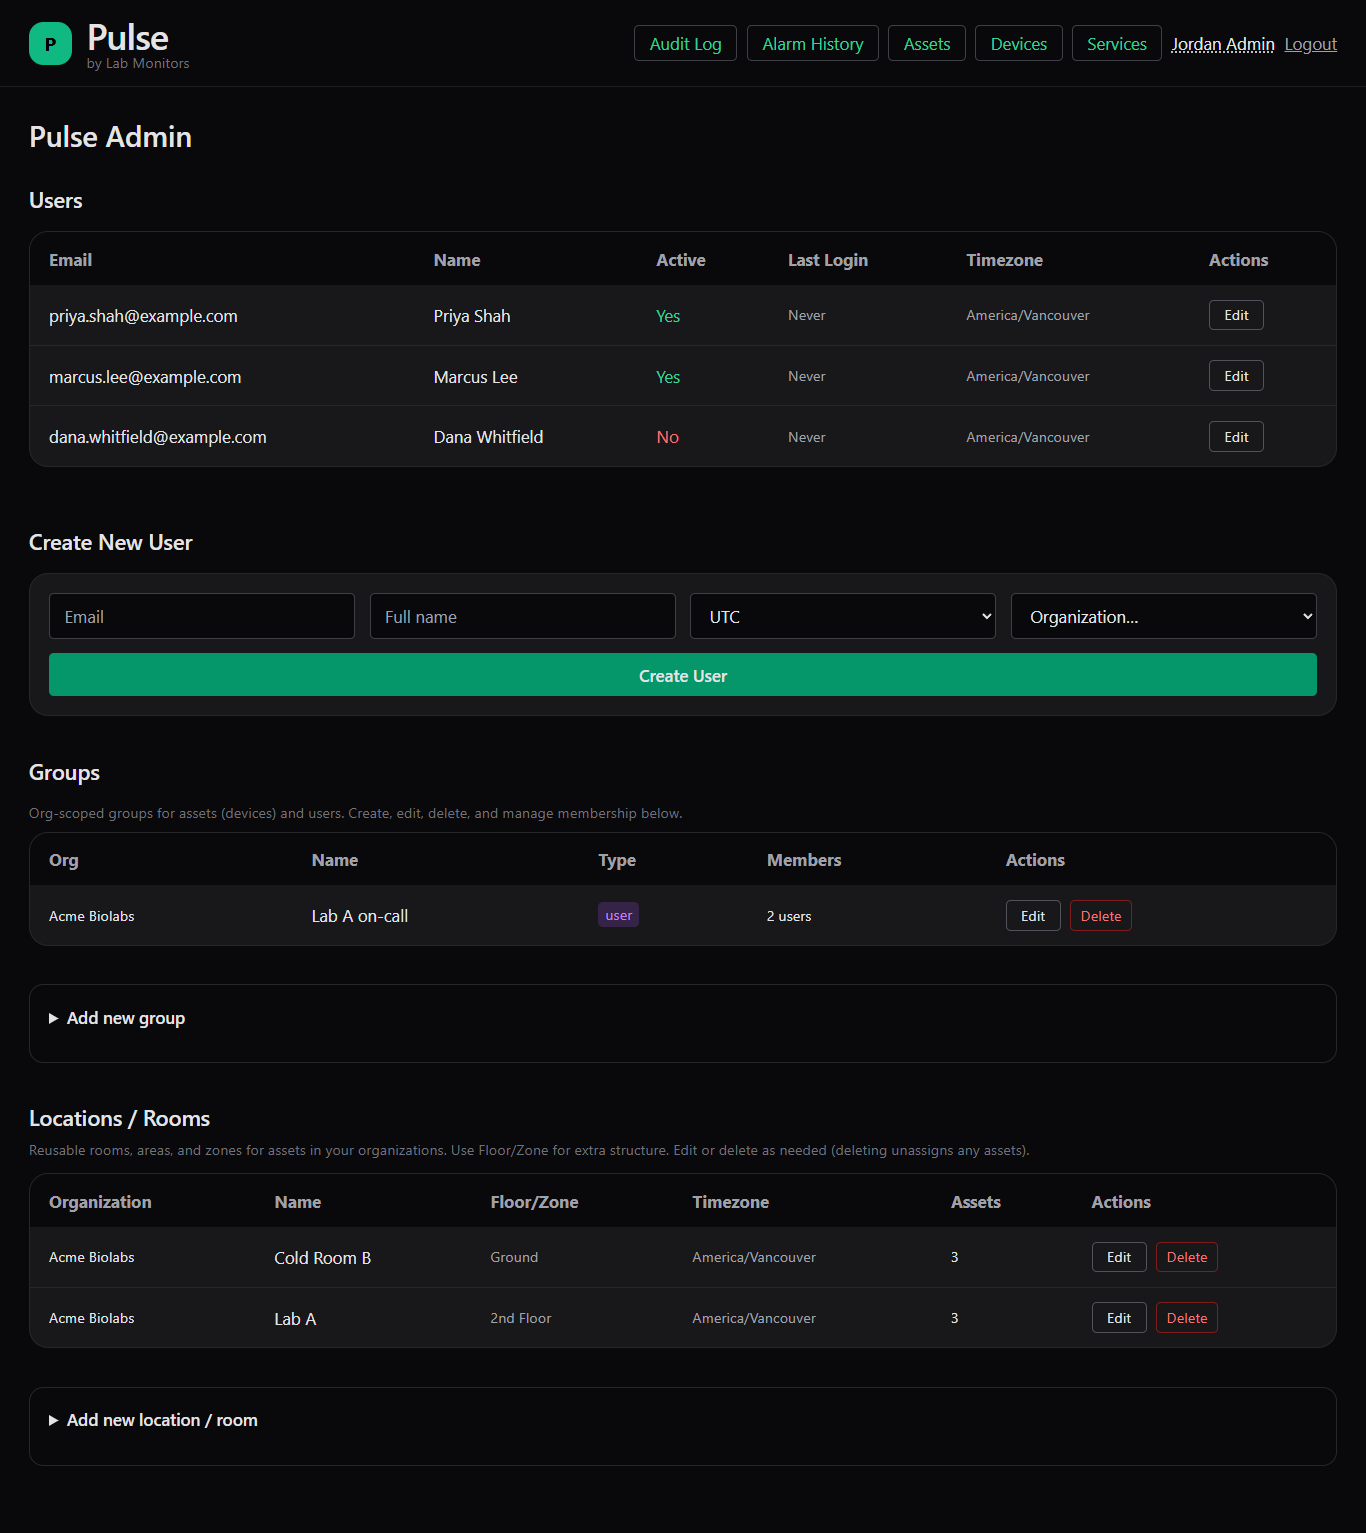
The Pulse Admin hub: Users, Groups and Locations / Rooms.
What you see
The row of tabs at the top of every administration page takes you to each area.
| Tab | What it is for | Documented in |
|---|---|---|
| Audit Log | Who changed what, and when, in your organization | Alarm history and audit log |
| Alarm History | Every alarm event: what fired, when, and at which severity | Alarm history and audit log |
| Assets | Your physical equipment (chambers, fridges, incubators) and their link to a service | Assets and locations |
| Devices | The wireless sensors: register, import, edit, calibrate, send commands | Devices and Calibration |
| Services | The monitors shown on the dashboard, and which device channels feed them | Services and channel mapping |
The Pulse Admin hub page itself holds three sections:
| Section | What it is for | Documented in |
|---|---|---|
| Users and Create New User | Accounts, roles, and each person's notification channels and schedules | Users and groups |
| Groups and Add new group | User groups (who a service notifies) and asset groups (labels for the dashboard) | Users and groups |
| Locations / Rooms and Add new location / room | Rooms, areas and zones that assets belong to | Assets and locations |
Two more places are reached from within these tabs rather than from the tab row:
- Archived services is linked from the top of the Services page. See Archiving and restoring services.
- Alarm limits, notification settings and the notification group of a service are edited on the service's own page, not in the Administration area. See Alarm limits and policies.
Note
If you administer more than one organization, every table shows an Organization (or Org) column and every create form asks which organization the new item belongs to. You only ever see items from your own organizations.
How the pieces fit together
Pulse models your site as a small hierarchy. Understanding it makes setup much quicker.
flowchart TD
    ORG[Organization] --> LOC[Location / Room]
    ORG --> USR[Users]
    ORG --> UG[User group]
    ORG --> AG[Asset group]
    LOC --> AST[Asset / Chamber]
    AST -- linked to --> SVC[Service]
    DEV[Device] -- channels mapped to --> SVC
    SVC --> LIM[Alarm limits and policies]
    SVC -- notification group --> UG
    AG -. labels .-> AST
USR -. members .-> UG| Term | Meaning |
|---|---|
| Organization | Your tenant in Pulse. Everything below belongs to exactly one organization. Contact Lab Monitors support to create or rename an organization. |
| Location / Room | A reusable room, area or zone (for example "Cold Storage 3"). An asset can be assigned to one location. The location name appears on dashboard cards, in Active Alarms and on service pages, and you can search the dashboard by it. |
| Asset / Chamber | A physical piece of equipment: a fridge, freezer, incubator or chamber. It carries the manufacturer, model, serial number, asset number and install date. |
| Device | A wireless sensor, identified by its Device EUI. A device belongs to one organization. |
| Channel | One measurement stream a device reports, such as a temperature or humidity reading. A channel can feed only one service at a time. |
| Service | The monitor you see as a card on the dashboard. A service is linked to one asset and receives one or more device channels through mappings. A service appears on the dashboard only once at least one channel is mapped to it. |
| Limits, bands and policies | The alarm thresholds, delays and notification settings of a service. |
| User group | A named set of users. A service sends its notifications to the members of its notification group. A service with no notification group never notifies anyone. |
| Asset group | A named set of assets. Group names appear as labels on dashboard cards and service pages, and you can search the dashboard by group name. Asset groups do not affect notifications. |
Suggested order for setting up a new site
Work top-down. Each step creates the things the next step needs.
- Confirm your organization is ready. Lab Monitors support creates the organization, connects it to the sensor network, defines the sensor types (device profiles) and registers the gateways before you start. Contact Lab Monitors support if any of these are missing.
- Create locations for each room or area. See Assets and locations.
- Create assets for each piece of equipment, fill in serial numbers and other details, and assign each asset to its location.
- Register or import devices on the Devices tab so Pulse knows each sensor. See Devices. Channels become available only after a device has sent its first readings.
- Create a service for each thing you want to monitor, link it to its asset, and map the device channels to it. See Services and channel mapping.
- Set alarm limits and notification settings on each service page. See Alarm limits and policies.
- Create a user group for the people who should be notified, and select it as the Notification group on each service. See Users and groups.
- Create users, set their role, timezone, phone number, notification channels and schedules, and add them to the user group. Each new user receives an activation email. See Users and groups.
- Ask each user to send themselves a test notification from their profile to confirm email and SMS delivery. See Your profile and notification settings.
Tip
Steps 2, 3 and 7 can be done before any hardware arrives. Linking an asset to a service also works before any channel is mapped.
Done by Lab Monitors support on request
Some actions are not available to organization administrators. Contact Lab Monitors support to:
- create, rename or remove an organization, or connect it to the sensor network;
- add or change a sensor type (device profile), or the commands a sensor type accepts;
- register or remove a gateway;
- decommission, reactivate or permanently delete a device, or change a device's sensor type;
- move a device to a different organization, or resolve a finding from the Run tenancy check tool on the Devices page;
- give a user access to a second organization, or move a user between organizations;
- grant or revoke global administrator rights;
- interpret the System Health page, if support directs you to it.
Related pages
- Roles at a glance and the Permissions matrix describe exactly what each role can do.
- Getting help explains how to reach Lab Monitors support.